Update Documentation
Welcome to the reference documentation for the Update Javascript client. This documentation is intended for developers who want to use the Update Javascript client to build their own applications.
For support, join the Update Discord server or open a GitHub issue.
What is Update?
Update lets you add SaaS subscriptions to your app in under 5 minutes. No backend routes. No webhook handling. No complex integrations. Just a few lines of code to turn your app into a fully monetized SaaS business.
Whether you're using Supabase, Firebase, Clerk, or your own custom auth — and whether you're monetizing with subscriptions, one-time payments, or usage-based plans — Update helps you launch your SaaS faster than ever before.
Wrap auth + billing, your way
Stop spending weeks building subscription logic. Update acts as a unified layer over your auth and billing providers, handling all the complex integration work for you. Install our SDK, add a few lines of code, and you're ready to accept payments.
Just pass us a session token from your auth provider, and we'll do the rest — mapping users to subscriptions, checking entitlements, and handling checkout flows. Launch your SaaS in minutes, not weeks.
Use your stack, not ours
Update is provider-agnostic — we support Supabase, Clerk, Firebase, and custom JWT-based auth out of the box. And for billing, we integrate directly with Stripe, with more providers like Paddle and LemonSqueezy coming soon.
Whether you're building with React, Next.js, SvelteKit, or something else, you can plug Update in with minimal setup and start monetizing in minutes.
Handle everything from the client
Because you pass the session token from your auth provider, Update can run entirely on the client. No need to build a complex backend or manage infrastructure — you can implement subscriptions, handle payments, and check user entitlements all from your frontend code. Go from zero to paid subscriptions in 5 minutes or less.
Installation
npm install @updatedev/js
Quickstart
An easy way to get started with Update is to use the create-update-app command. From this
tool, you can choose a framework and have a fully working Update application in seconds. All
you need to do is provide a name and your API keys.
npm create update@latest
See our examples for source code and examples of how to use Update in different frameworks.
Initializing
Create Update Client
To use Update throughout your application, you'll need to initialize the main client first.
Depending on what auth provider you are using, you can initialize the client with different options.
import { createClient } from "@updatedev/js";export async function createUpdateClient() {return createClient(process.env.NEXT_PUBLIC_UPDATE_PUBLISHABLE_KEY!, {getSessionToken: async () => {// This must be replaced with your own logic to get your session token// For example, with Supabase://// import { createSupabaseClient } from '@/utils/supabase/client'// const supabase = createSupabaseClient()// const { data } = await supabase.auth.getSession()// if (data.session == null) return// return data.session.access_token// For this example, we'll just return a static tokenreturn "your-session-token";},environment: process.env.NODE_ENV === "production" ? "live" : "test",});}
Next.js
Using Update in a SSR environment
For the full Next.js example with source code, see our Next.js example.
You should create a utils/update directory where you can create client and server files.
npm install @updatedev/js
import { createClient } from "@updatedev/js";export async function createUpdateClient() {return createClient(process.env.NEXT_PUBLIC_UPDATE_PUBLISHABLE_KEY!, {getSessionToken: async () => {// This must be replaced with your own logic to get your session token// For example, with Supabase://// import { createSupabaseClient } from '@/utils/supabase/client'// const supabase = createSupabaseClient()// const { data } = await supabase.auth.getSession()// if (data.session == null) return// return data.session.access_token// For this example, we'll just return a static tokenreturn "your-session-token";},environment: process.env.NODE_ENV === "production" ? "live" : "test",});}
React
Using Update in a React environment
For the full React example with source code, see our React example.
If you're using Update in a React environment, using Update is as easy as installing the package and importing the client.
npm install @updatedev/js
import { supabaseClient } from "@/utils/supabase";import { createClient } from "@updatedev/js";export const updateClient = createClient(import.meta.env.VITE_UPDATE_PUBLISHABLE_KEY!,{getSessionToken: async () => {// This must be replaced with your own logic to get your session token// For example, with Supabase://// import { supabaseClient } from '@/utils/supabase'// ...// const { data } = await supabaseClient.auth.getSession()// if (data.session == null) return// return data.session.access_token// For this example, we'll just return a static tokenreturn "your-session-token";},});
Overview
In order for Update to properly tie billing info to users, we need to be able to identify users. The cool thing about Update is that because you're providing a session token, this can all be done on the client side. If you configure your auth provider and pass the session token to Update, there is no need to create your own backend logic to check user billing info.
You can use Update with ANY auth provider, including if you roll your own auth. For hosted auth providers, we support the following auth providers out of the box:
- Supabase
- Clerk
- Firebase
If your auth provider isn't listed, you can always use the custom auth provider and provide a JWT secret.
Supabase
Using Update with Supabase
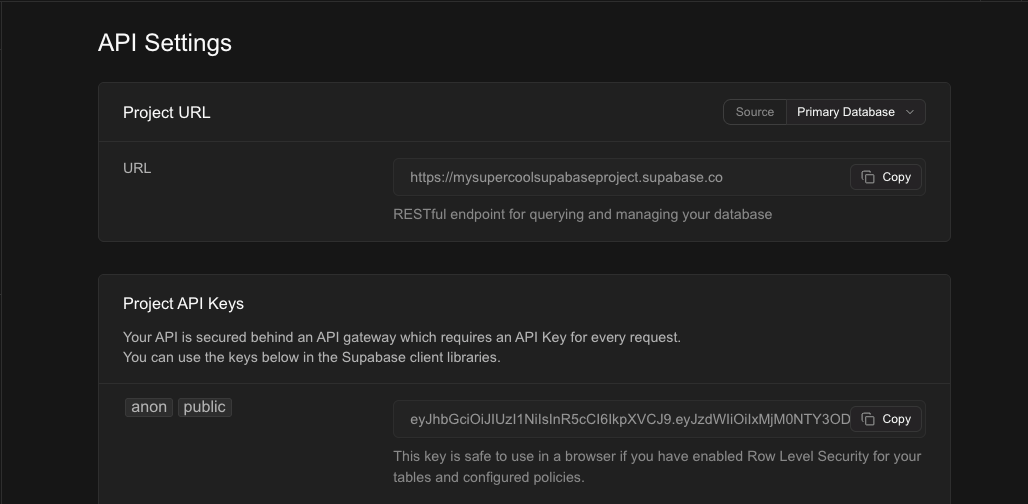
Before using Update, you'll need to create a Supabase project and enable the auth provider. In the update dashboard, you'll need to add your Supabase project's anon key and project URL.
First, grab your anon key and project URL from the Supabase dashboard:
Then, add the anon key and project URL to the Update dashboard:
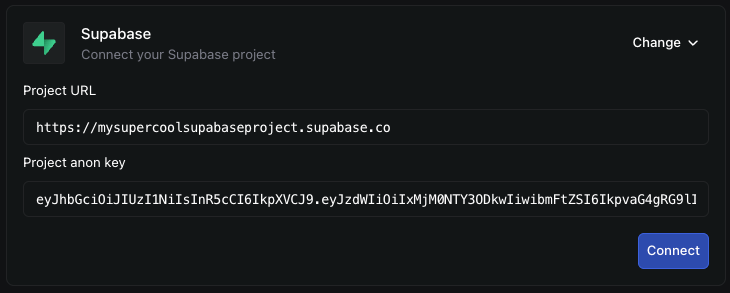
Then, you can initialize Update with something like the following:
import { createClient } from "@updatedev/js";import { createSupabaseClient } from "@/utils/supabase/client";export async function createUpdateClient() {return createClient(process.env.NEXT_PUBLIC_UPDATE_PUBLISHABLE_KEY!, {getSessionToken: async () => {const supabase = createSupabaseClient();const { data } = await supabase.auth.getSession();if (data.session == null) return;return data.session.access_token;},});}
Clerk
Using Update with Clerk
Get your JWKS URL from the Clerk dashboard:
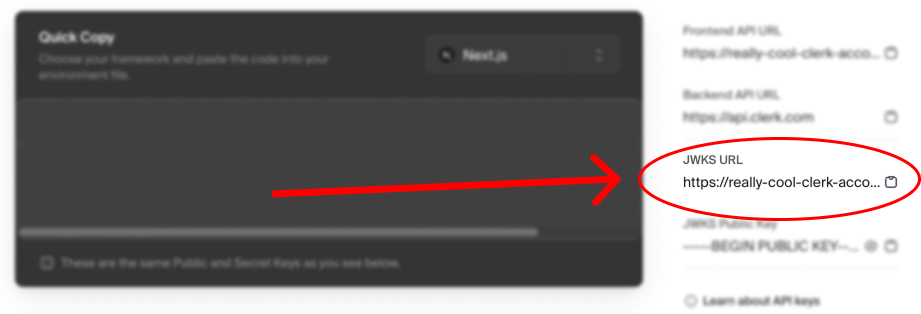
Then, add the JWKS URL to the Update dashboard:
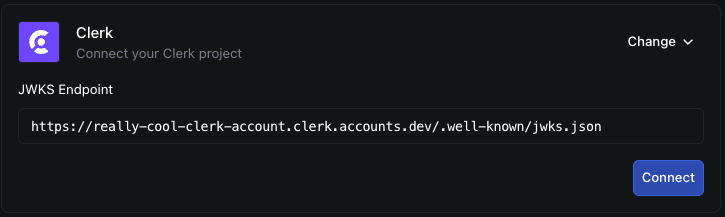
Then, you can initialize Update with something like the following:
import { createClient } from "@updatedev/js";import { useAuth } from "@clerk/nextjs";export function useUpdateClient() {const { getToken } = useAuth();return createClient(process.env.NEXT_PUBLIC_UPDATE_PUBLISHABLE_KEY!, {getSessionToken: async () => {const token = await getToken();return token;},});}
Firebase
Using Update with Firebase
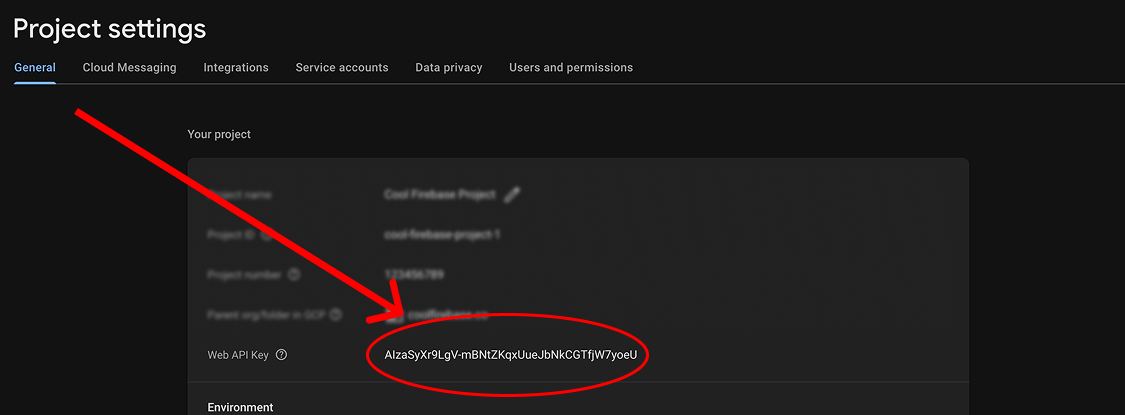
First, grab your Firebase project's api key from the Firebase dashboard:
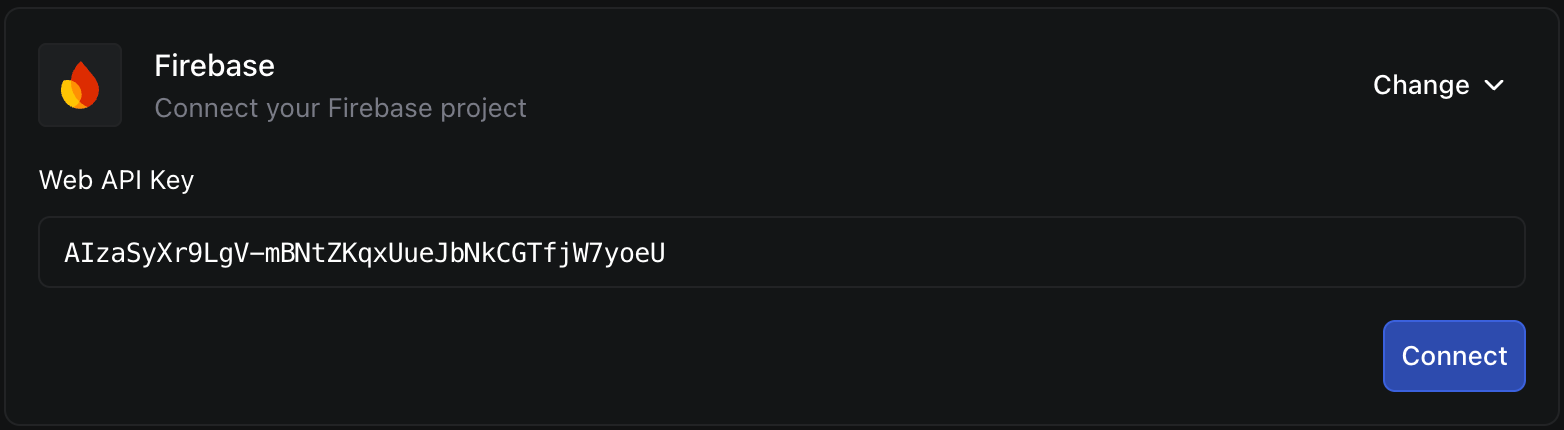
Then, add the api key to the Update dashboard:
Then, you can initialize Update with something like the following:
import { createClient } from "@updatedev/js";import { firebaseAuth } from "@/utils/firebase/config";export function createUpdateClient() {return createClient(process.env.NEXT_PUBLIC_UPDATE_PUBLISHABLE_KEY!, {getSessionToken: async () => {const currentUser = firebaseAuth.currentUser;if (!currentUser) return null;const idToken = await currentUser.getIdToken();return idToken;},environment: process.env.NODE_ENV === "production" ? "live" : "test",});}
Custom Auth
Using Update with Custom Auth
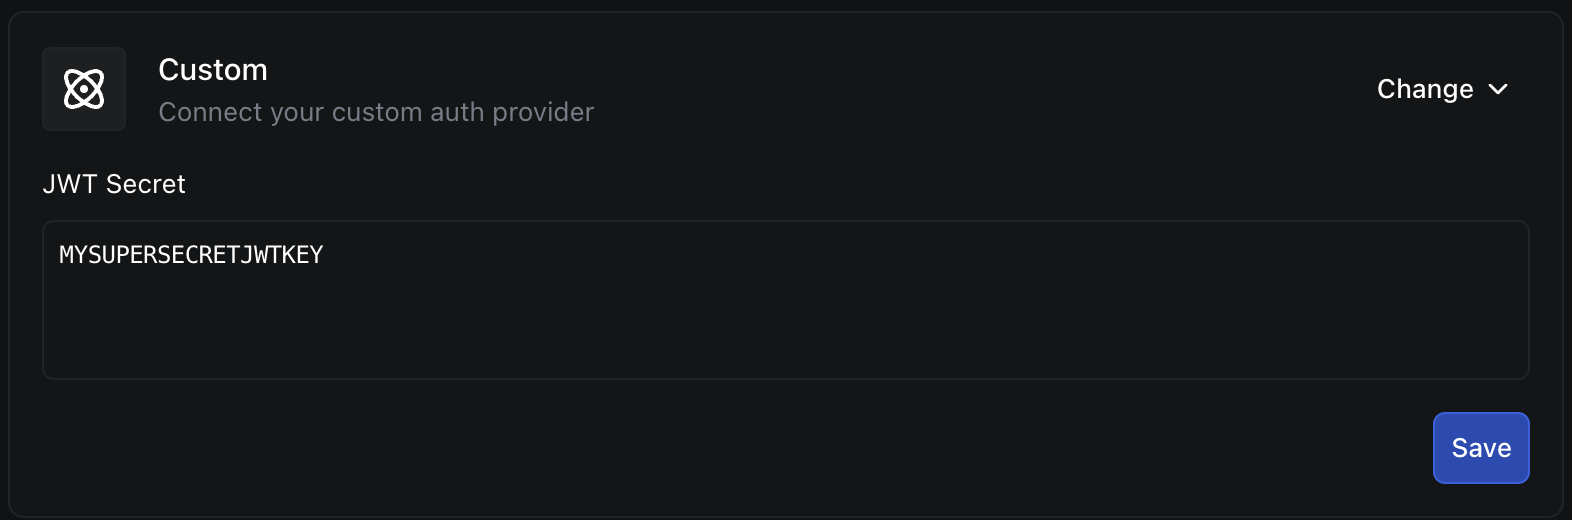
If you're using a custom auth provider, first you'll need to create a JWT secret.
Then, add the JWT secret to the Update dashboard:
Then, you can initialize Update with something like the following:
import { createClient } from "@updatedev/js";import { getSessionToken } from "@/utils/my-custom-auth";export function createUpdateClient() {return createClient(process.env.NEXT_PUBLIC_UPDATE_PUBLISHABLE_KEY!, {getSessionToken: async () => {const token = await getSessionToken();if (!token) return;return token;},});}
Get Products
Get all products that you've created in the Update dashboard.
const { data, error } = await client.billing.getProducts();
{"data": {"products": [{"id": "f153c19a-b68f-49cd-8327-9fa85442f01c","name": "Basic","description": "","prices": [{"id": "32b3cce4-d9ce-49a2-a151-f5b85008a6b6","unit_amount": 1000,"currency": "usd","interval": "month","interval_count": 1}]}]},"error": null}
Get User Subscriptions
Get all subscriptions for a user.
const { data: subscriptionData } = await client.billing.getSubscriptions();
{"data": {"subscriptions": [{"id": "3b6da9f5-d0b3-4056-8ab7-621fa5d7af28","status": "active","cancel_at_period_end": false,"canceled_at": null,"current_period_start": "2025-03-16T14:49:43+00:00","current_period_end": "2025-04-16T14:49:43+00:00","price": {"id": "32b3cce4-d9ce-49a2-a151-f5b85008a6b6","unit_amount": 1000,"currency": "usd","interval": "month","interval_count": 1},"product": {"id": "f153c19a-b68f-49cd-8327-9fa85442f01c","name": "Basic","description": "","status": "active"}}]},"error": null}
Create Checkout Session
In Update, you can create a checkout session to sell subscriptions and one-time products. We connect with your billing provider to create the session. For now, we only support Stripe.
A typical flow is to get the price id from the getProducts function and then
redirect the user to the checkout session.
const { data, error } = await client.billing.createCheckoutSession(priceId,{redirect_url: 'http://localhost:3000/protected/subscription',},);
Parameters
price_idstringRequiredThe price id of the product to create a checkout session for.
options.redirect_urlstringOptionalThe URL to redirect the user to after the checkout session is created.
Cancel Subscription
Cancel a subscription.
await client.billing.updateSubscription(id, {cancel_at_period_end: true,});
Reactivate Subscription
Reactivate a subscription.
await client.billing.updateSubscription(id, {cancel_at_period_end: false,});
List Entitlements
List all entitlements for a user.
const { data, error } = await client.entitlements.list();
{"data": {"entitlements": ["premium","pro","enterprise"]},"error": null}
Check Entitlement
Check if a user has an entitlement.
const { data, error } = await client.entitlements.check("premium");
{"data": {"has_access": true},"error": null}